Primavera Unifier - Project Shell Audit Reports
Out of the box, Primavera Unifier boasts multiple layers of auditing capabilities, so that you can keep track of the changes made in just about all areas of your Unifier database. From audit logs detailing activity in individual modules, to running audit reports in your project shells, or carrying out system reports in your company workspace, there are many ways to stay informed of proceedings in Unifier.
In this blog, we will discuss running audit reports in a project shell. This combs the entire shell based on your search parameters and is a great way to get a comprehensive view of the activity in the shell. To access audit reports, first, navigate to the project shell that you wish to run the audit report in.
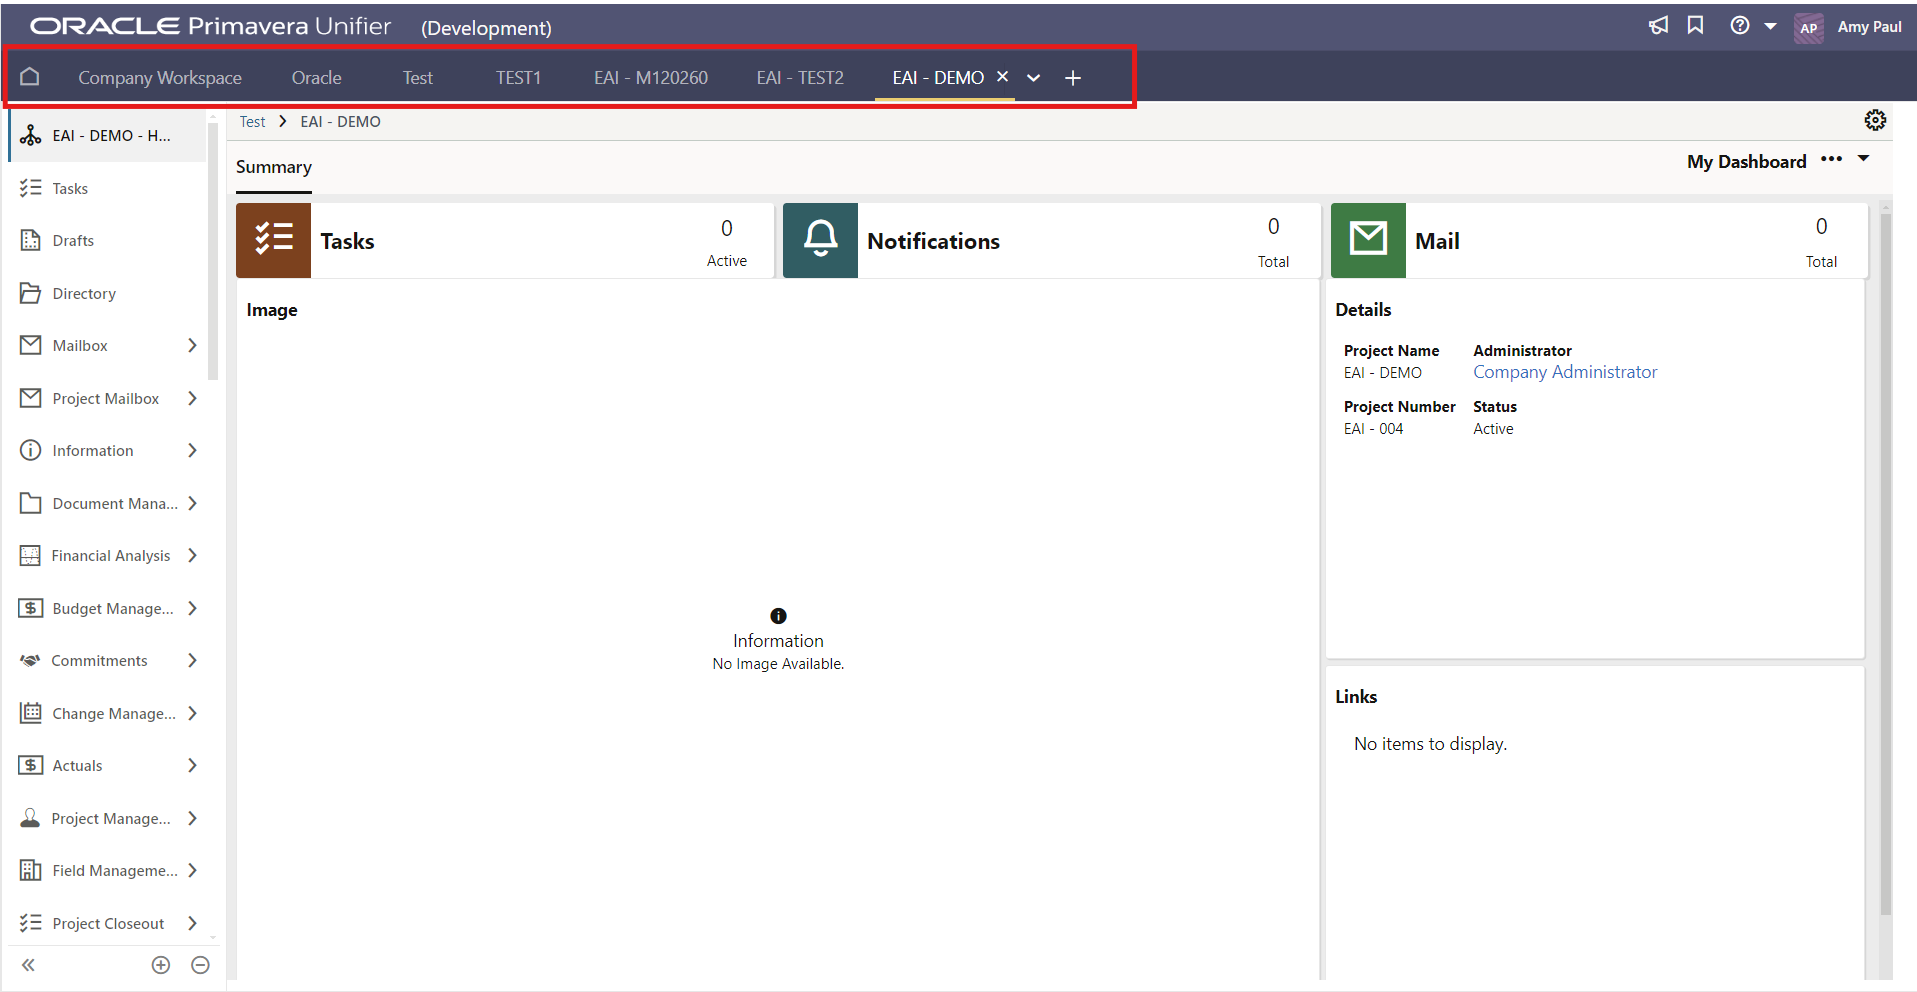
In this blog, we will discuss running audit reports in a project shell. This combs the entire shell based on your search parameters and is a great way to get a comprehensive view of the activity in the shell. To access audit reports, first, navigate to the project shell that you wish to run the audit report in.

Note: If you do not see the project shell you are looking for along the top bar, make sure that your user account has access to it, either individually or through groups, and try clicking the + sign and searching the name to add it to the top bar for easy access.
Once you are in the correct project shell, make sure that you are in user mode which you can check by the colour of the gear in the top right corner: blue for administration mode and black/grey for user mode (simply click it to switch modes, if you have administration access).

Scroll down the list on the left, all the way to the bottom, and click on Reports.
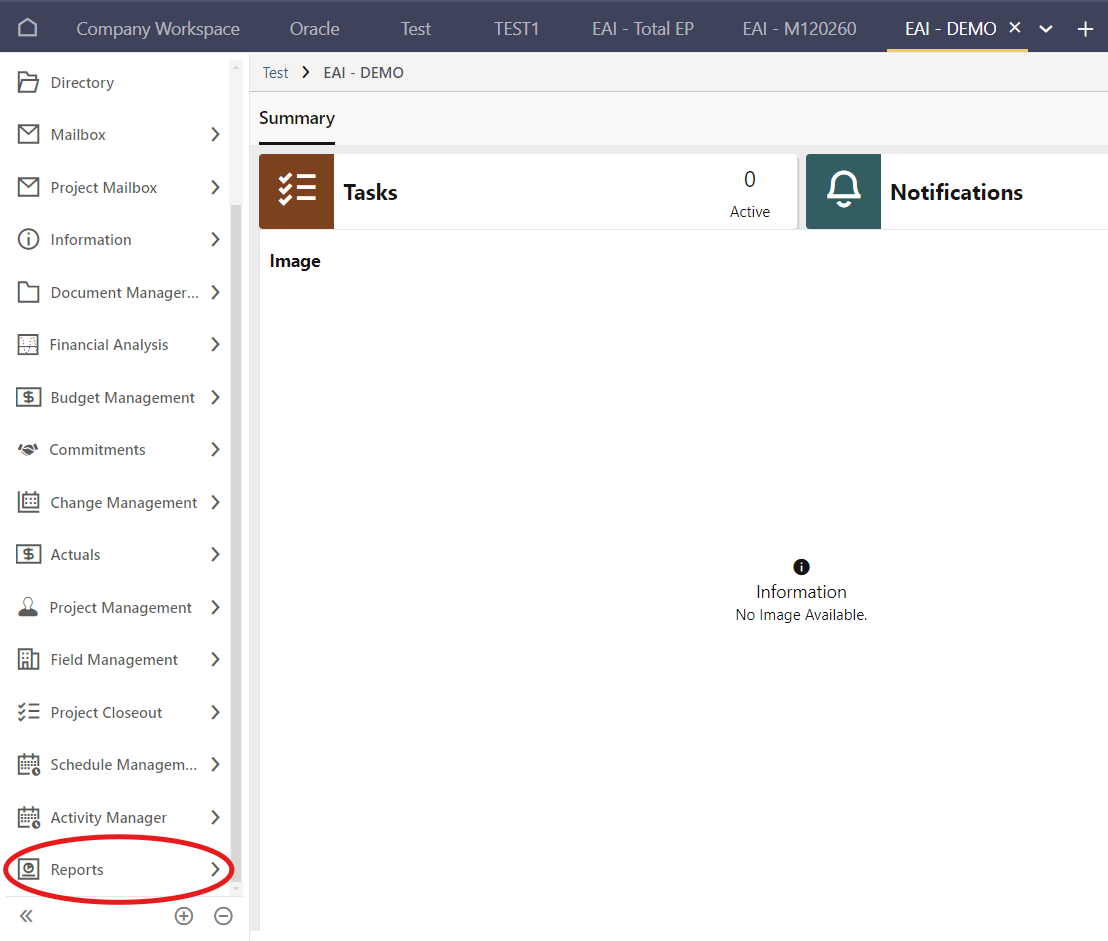
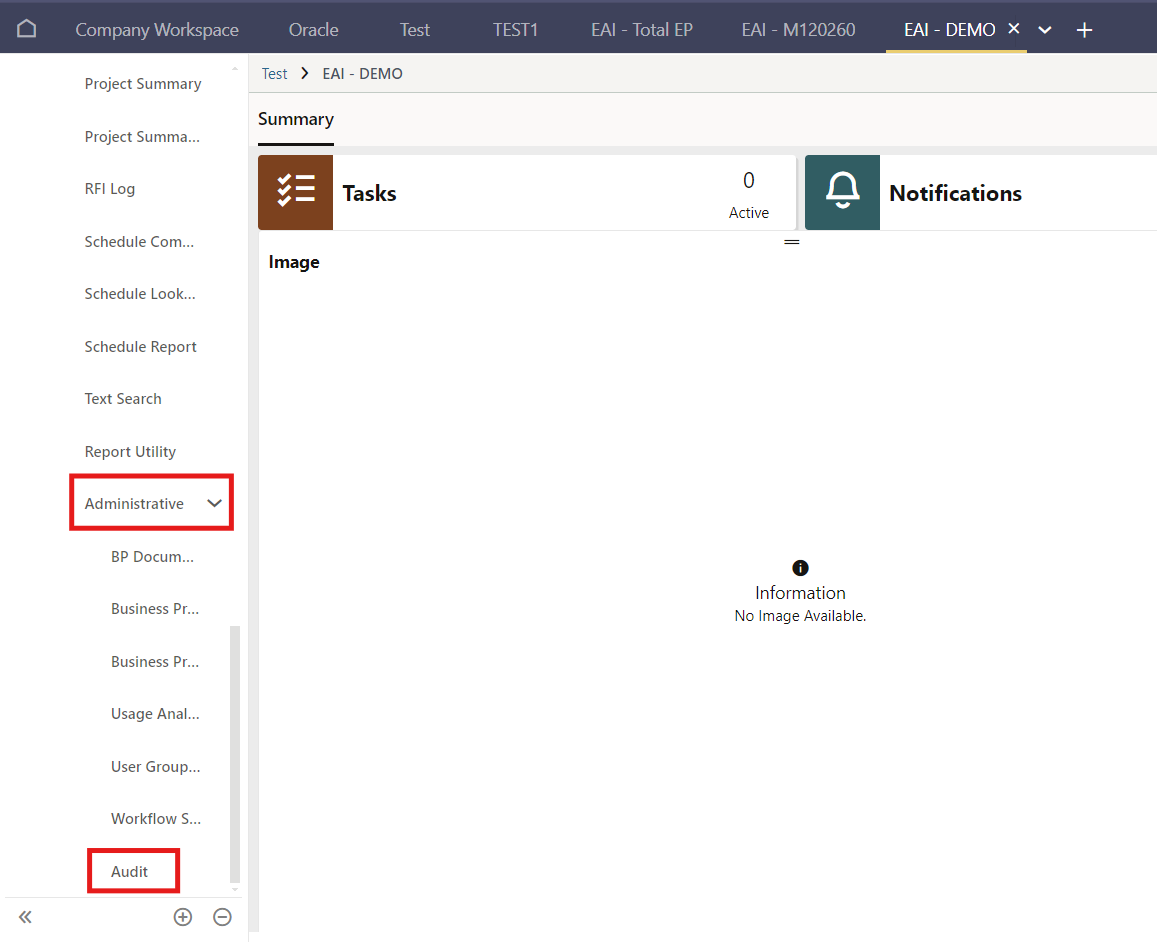
This will open up a subsection of reports, where you will again scroll to the bottom and click on Administrative. (Note: if you do not see this option, check that you have the proper permissions for this project shell.) Under Administrative, click Audit.
The following page will open.
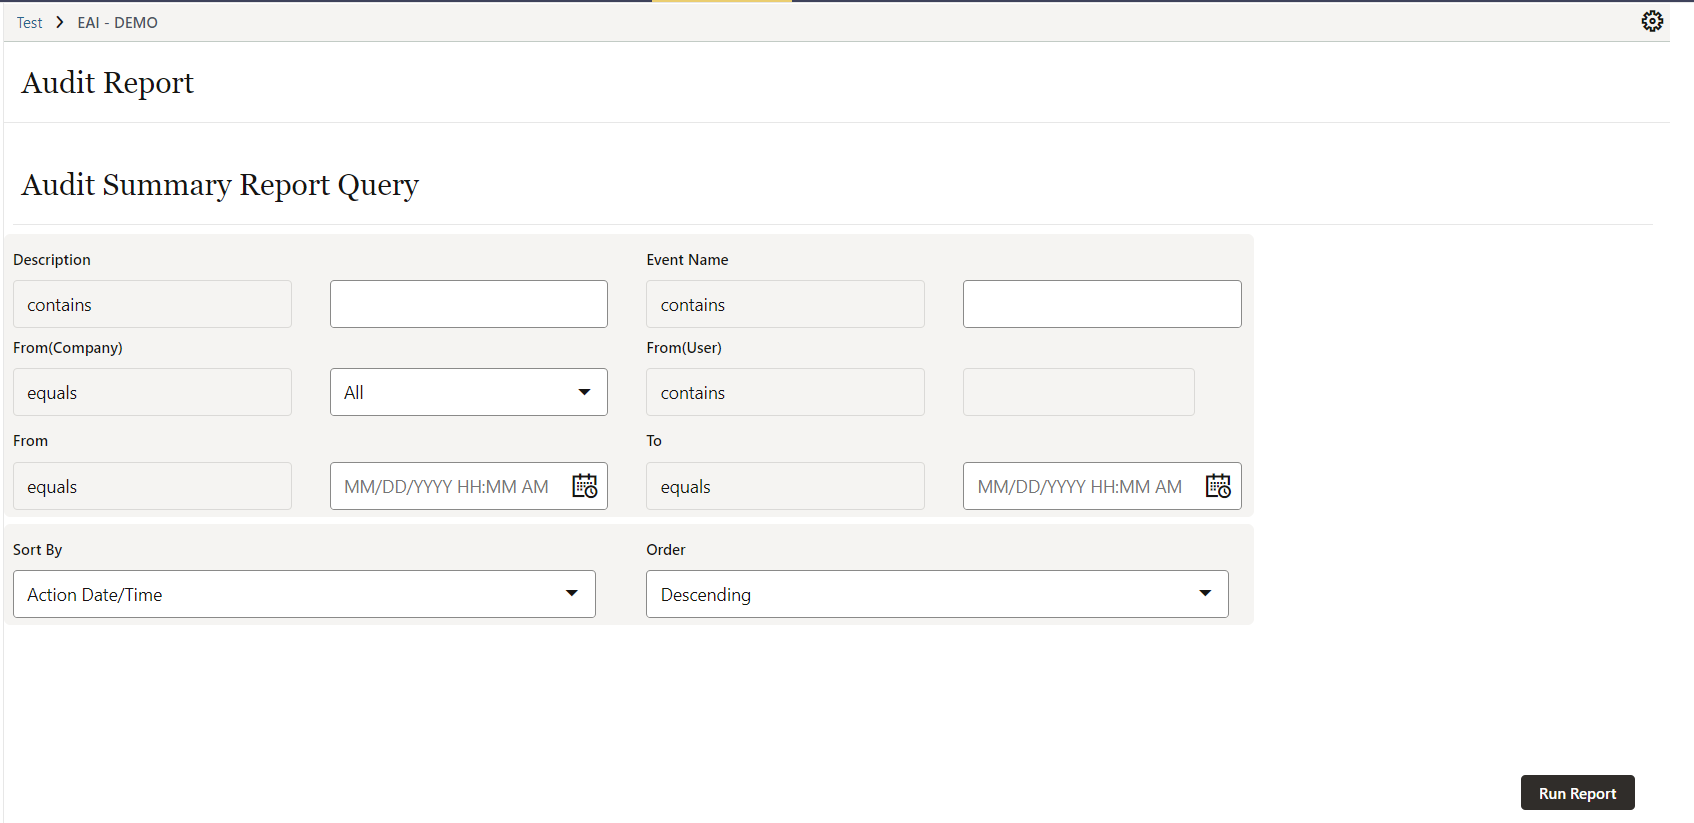
You can specify your search parameters here. For a quick explanation of the sections:
Description - This goes hand in hand with Event Name. It is a description of the action that was taken. For example, “member added”, “deactivate”, “configuration”.
Event Name - This allows you to choose the type of action that was performed - for example, “update rule status”, “create”, “project WBS sheet”.
From (Company) - Specify the company whose actions you are looking to review. Once you specify the company, this will open up the ability to pick a specific user that you wish to see the actions of.
From (User) - Once you’ve specified the company, you can choose the relevant user by typing their name or selecting from the pick list.
From/To - These fields allow you to specify the specific date range you are looking to see.
Sort By/Order - These fields allow you to choose how you wish to view the resulting report, choose how you are sorting the results, and decide the order those results will be listed in.
If you decide to leave the report blank, it will generate a full audit report on all available actions and changes that have been made in the project shell without any filters.
Click Run Report.
The resulting audit report will be displayed in a PDF that is downloaded to your device.
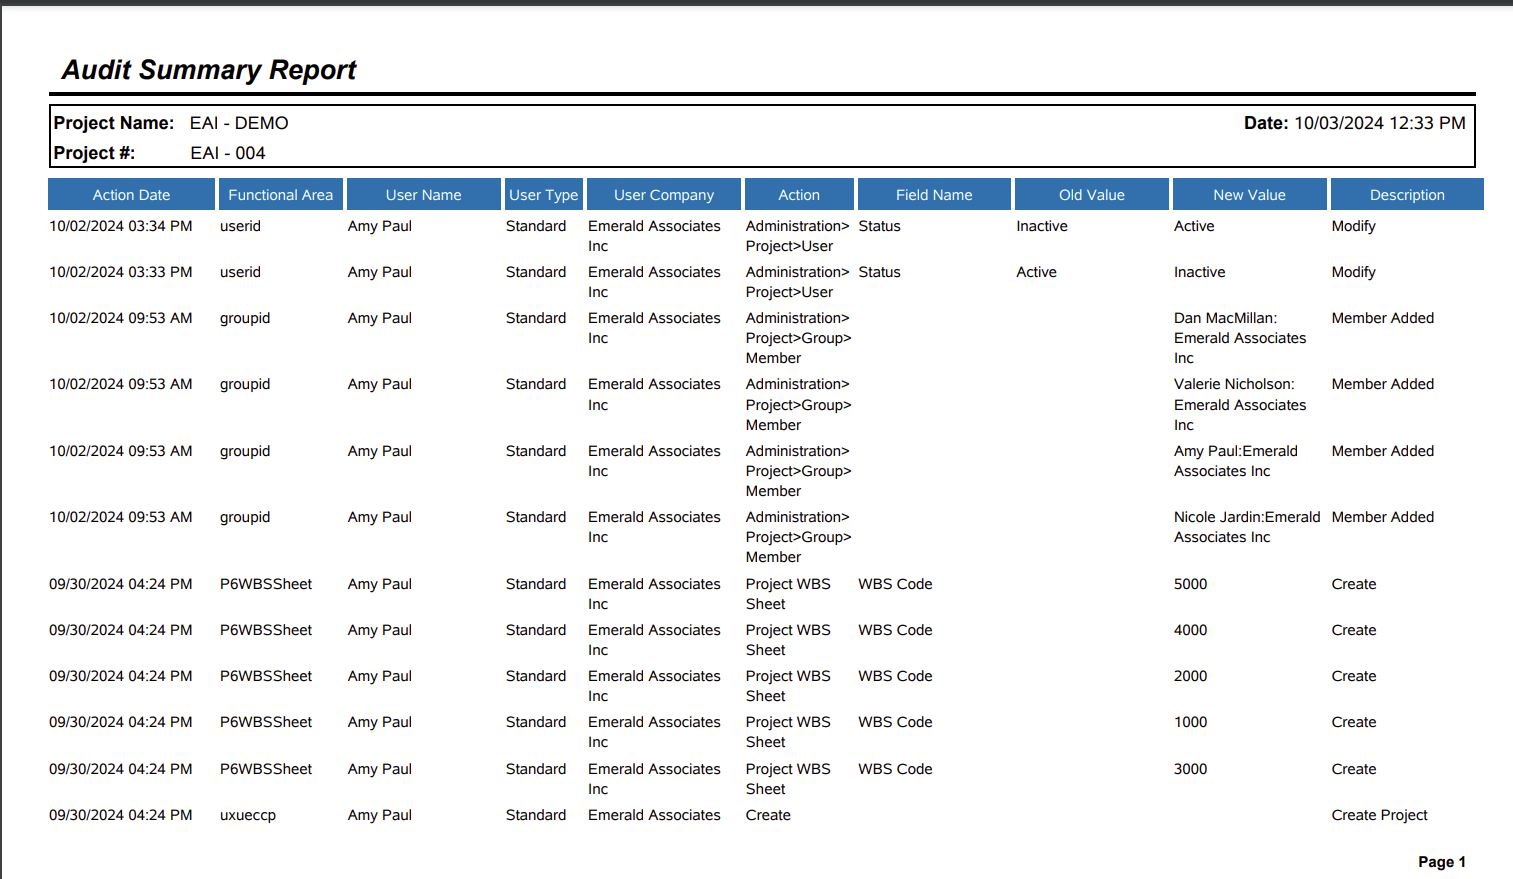
The following example was filtered by user and sorted by Action/Date in descending order.
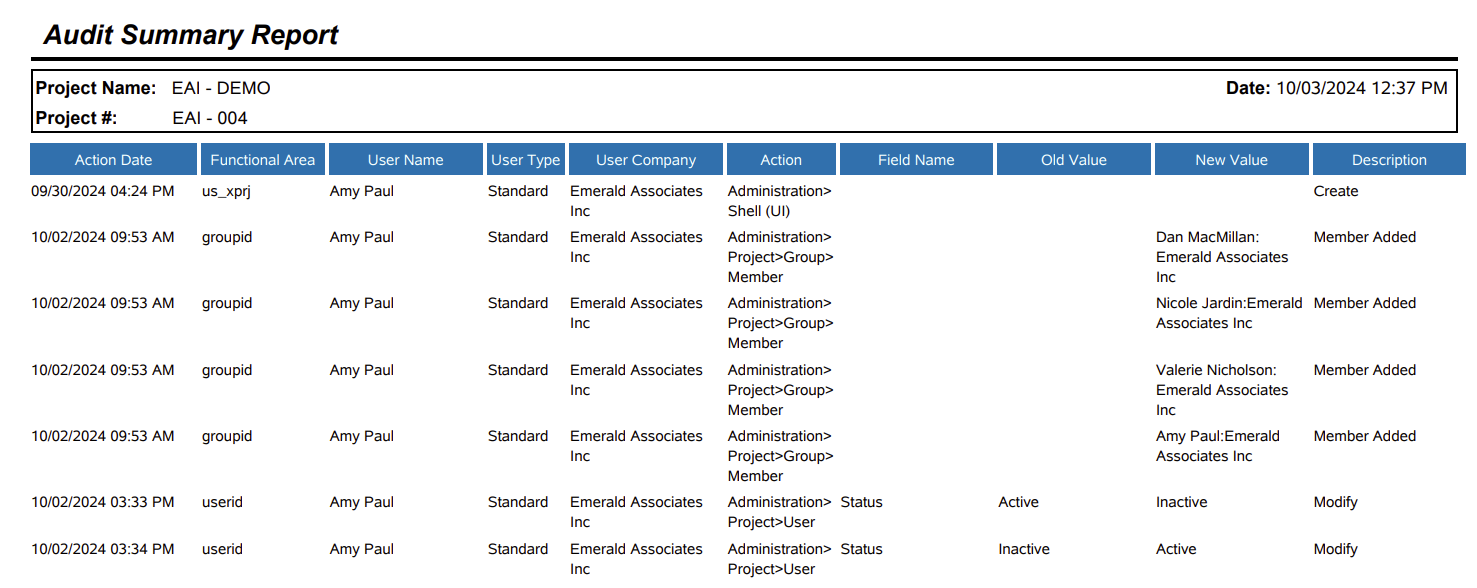
This example report was created by filtering by Event Name “administration”, and sorted by Action/Date in ascending order.
Project shell audit reports are a fantastic way to keep on top of what is being done, when, and by whom, so that you can trace any issues to their source and gain an understanding not only for how to fix them, but also how to prevent them from happening again.
No video selected.
Once you are in the correct project shell, make sure that you are in user mode which you can check by the colour of the gear in the top right corner: blue for administration mode and black/grey for user mode (simply click it to switch modes, if you have administration access).

Scroll down the list on the left, all the way to the bottom, and click on Reports.

This will open up a subsection of reports, where you will again scroll to the bottom and click on Administrative. (Note: if you do not see this option, check that you have the proper permissions for this project shell.) Under Administrative, click Audit.

The following page will open.

You can specify your search parameters here. For a quick explanation of the sections:
Description - This goes hand in hand with Event Name. It is a description of the action that was taken. For example, “member added”, “deactivate”, “configuration”.
Event Name - This allows you to choose the type of action that was performed - for example, “update rule status”, “create”, “project WBS sheet”.
From (Company) - Specify the company whose actions you are looking to review. Once you specify the company, this will open up the ability to pick a specific user that you wish to see the actions of.
From (User) - Once you’ve specified the company, you can choose the relevant user by typing their name or selecting from the pick list.
From/To - These fields allow you to specify the specific date range you are looking to see.
Sort By/Order - These fields allow you to choose how you wish to view the resulting report, choose how you are sorting the results, and decide the order those results will be listed in.
If you decide to leave the report blank, it will generate a full audit report on all available actions and changes that have been made in the project shell without any filters.
Click Run Report.
The resulting audit report will be displayed in a PDF that is downloaded to your device.
The following example was filtered by user and sorted by Action/Date in descending order.

This example report was created by filtering by Event Name “administration”, and sorted by Action/Date in ascending order.

Project shell audit reports are a fantastic way to keep on top of what is being done, when, and by whom, so that you can trace any issues to their source and gain an understanding not only for how to fix them, but also how to prevent them from happening again.